
Are you thinking about starting a blog in 2024? You’re in the right place!
Blogging has become a popular way to share your thoughts, ideas, and expertise with the world.
Whether you want to document your personal journey, showcase your creative endeavors, or even turn your blog into a profitable venture, this beginner’s guide will provide you with all the essential steps to get started.
From choosing the right niche to setting up your blog, creating content, and promoting your blog, this guide will walk you through everything you need to know to launch a successful blog in 2024.
So, let’s dive in and discover how to turn your blogging dreams into a reality.
How to Start a Blog in 10 Easy Steps
In this blog post, I’ll show you some steps you can use in your first year of blogging. I blog for a living, and my blogging business has given me a lot of money.
The first year was the hardest, though. You can make it easier on yourself by reading the steps below. Are you ready? Let’s get started.
Step 1: Niche Research
If I were starting as a blogger like you, I would first research my niche to see what other blogs are talking about.
What are their most-read posts? Do these blogs still get new content, or do they look like they’ve been abandoned? Doing this will help you determine if your chosen niche is a good fit for you.
If you want to start a blog about building muscle for middle-aged men, do you find the top posts interesting, or do they get boring after a while?
Are you interested enough in this niche or topic to spend a long time learning more about it?
Exploring other blogs in your chosen niche will help you decide if you want to keep blogging about a specific topic.
This research will also help you list the first ten blog posts you want to write. They should be the topics that most of your competitors have written about on their blogs.
If they have, there is a demand for these topics, and many people are searching for them.
Step 2: Choose a Blog Name and Domain Name
After you’ve decided on your niche, you’ll need to choose a domain name for your blog.
This is a question which I got a lot. People frequently ask me, “How can I get a perfect domain name?” or “What should I do when I get a domain?” Also, there are many variants of this question.
Although, I didn’t think it was that important.” But today, I would like to talk about how to choose a name for your blog, so let’s get started.
Usually, if you do something, I suggest you start your personal brand because I like making my personal brand and giving things my name.
But if you’re not trying to prove yourself that, one of the best things you can do is make a blog domain name out of two of your keywords.
For example, if you want to start a blog about desserts or cakes, you might choose “tasty cakes” and put it together to make a blog name.
Because, you know, this is the web, and it’s constantly changing, and a lot of things aren’t always available and put them together to make a blog name.
This is very obvious and good for search engines. Putting two keywords together helps people remember your URL when they want to visit your site.
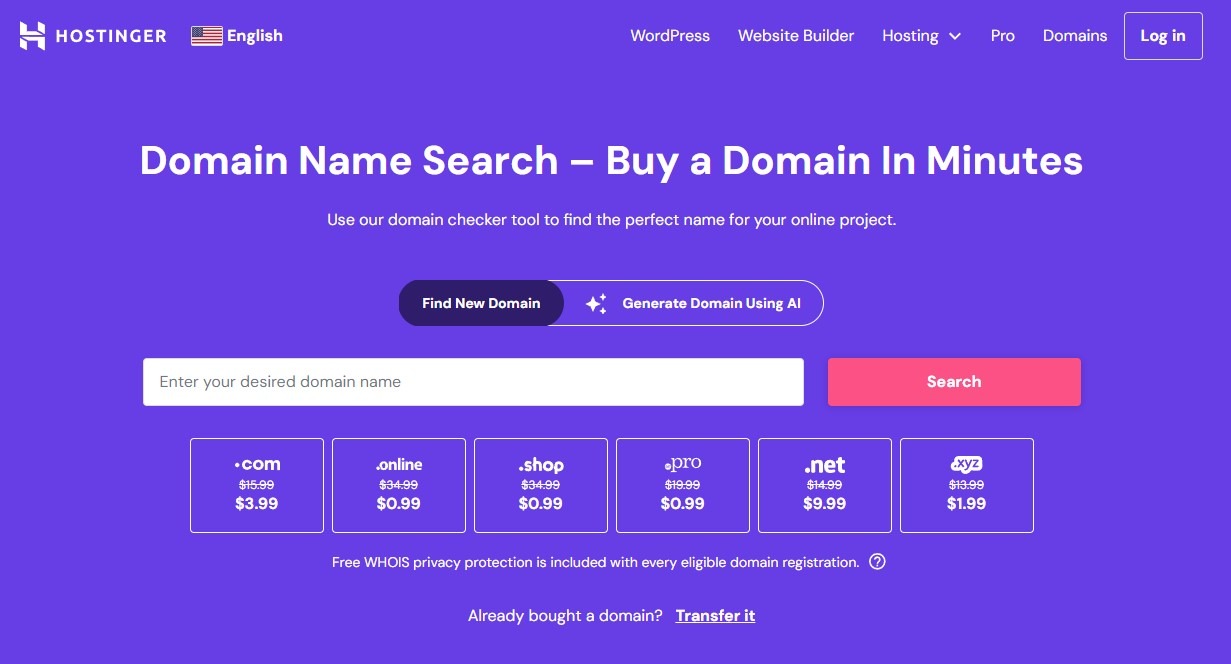
You can use the Hostinger domain checker feature to check your domain’s availability.
Just put your chosen keyword which you want to register for your blog, then enter the search button; it will show you availability and suggestions for your domain.
Also, if you don’t know how to choose a perfect domain name for a blog, you can refer to my step-by-step guide on how to choose a perfect domain name.
Step 3: Pick a Web Hosting
You need good web hosting when you have a perfect domain name for your blog. Hosting is a server that stays online 24/7 and where you can put all of your blog website’s files.
Many hosting providers are available on the web, but which one is perfect for you? It’s a very hassle for you to find a good hosting provider.
The good news is that Hostinger, my favorite web hosting provider, offers both a domain and hosting package deal.
Also, Hostinger is one of the best web hosting providers in the industry. So, you should get started with Hostinger.
Moreover, it’s cheap, and as a new blogger, I’d tell you to wait to spend a lot of money. If you want to buy Hostinger for a 75% discount, click this special link.
Now, I will show you a step-by-step guide to buying domain hosting from Hostinger.
After opening Hostinger on a new window, you will find the Hostinger homepage. On the homepage, you will find a get started button.
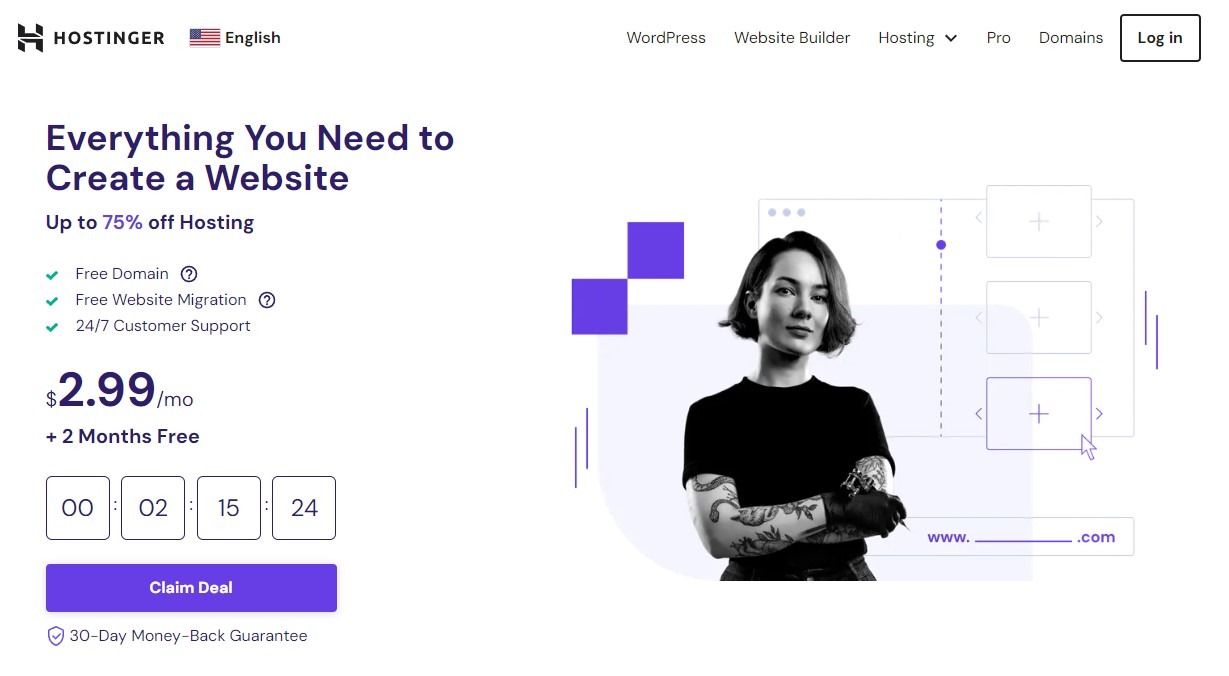
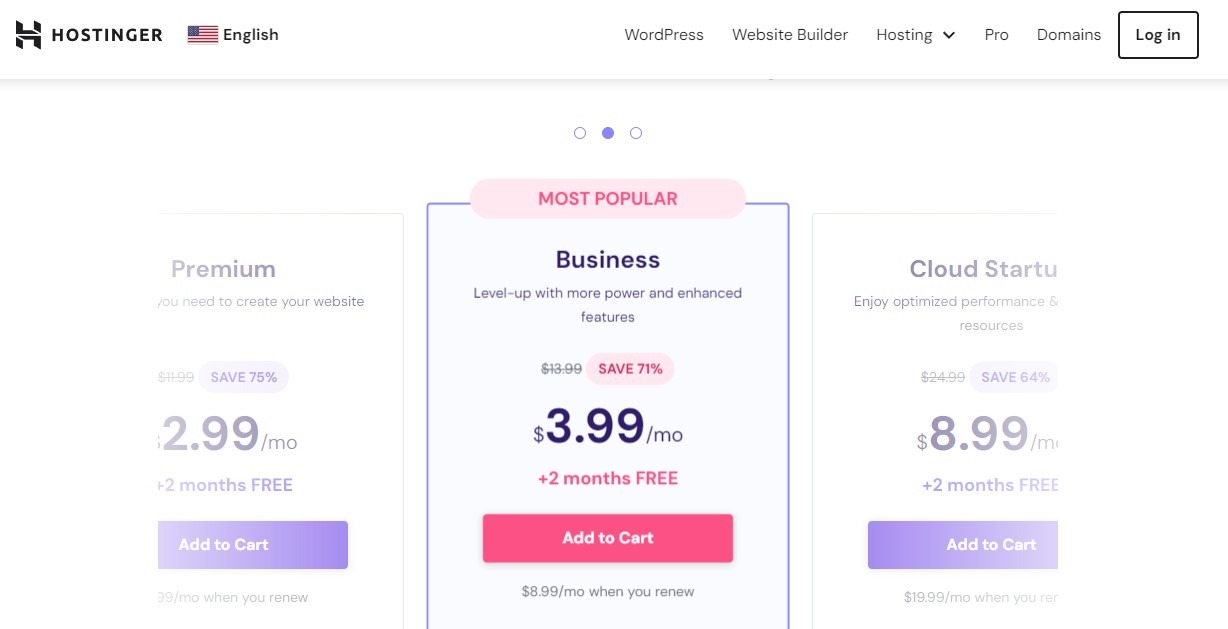
Then, simply click that, and it will take you to the shared hosting pricing page. After that, as a beginner, I will suggest you buy the shared hosting premium plan.
You can claim your free domain name to complete the purchase. This is optional, and if you want to get your free domain after completing your hosting purchase, you can do that.

Once you go to the next page, carefully fill in your contact information. You will find many options here, but without Domain Privacy Protection, uncheck everything. Because as a beginner, you won’t need those options.
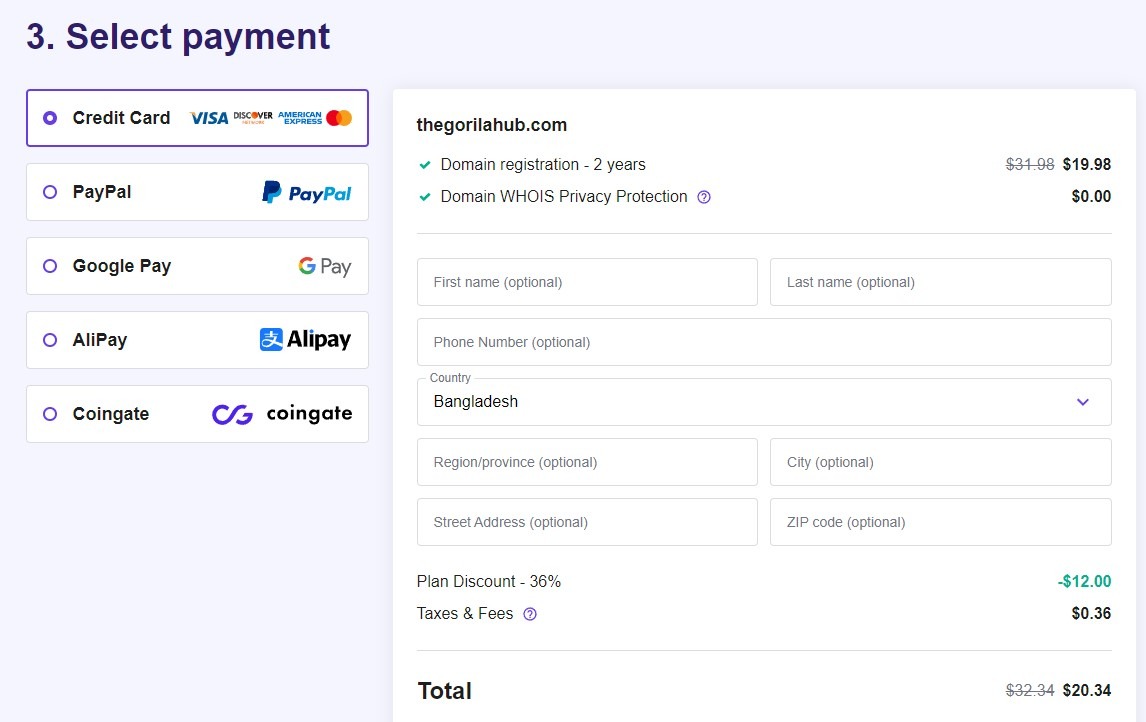
After completing this process, you will find the payment page. You can pay with a credit/debit card, or if you want to pay via PayPal, you can click on more payment options. That’s it.
Step 4: Install WordPress
If you use Hostinger, you can easily install WordPress on your domain name.
Hostinger makes it easy to start a blog by installing WordPress with just one click from your hosting panel. You have to follow some simple steps to complete the setup.
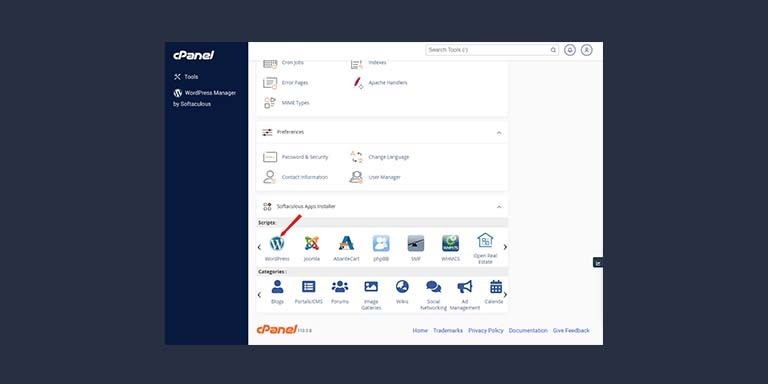
First, you log in to your Hostinger dashboard, find the CPanel under the hosting section, and then select WordPress CMS.
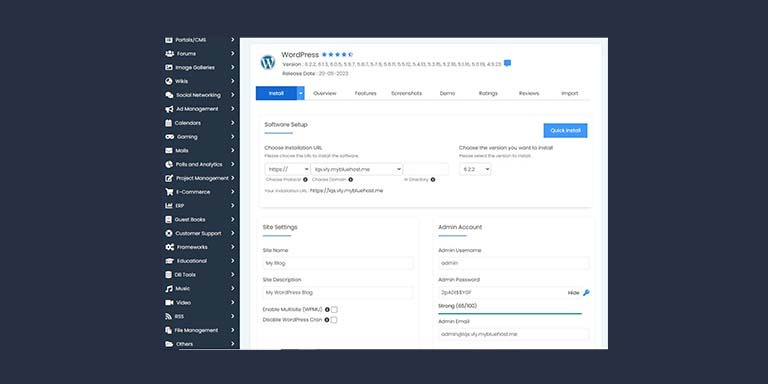
After clicking WordPress CMS, WordPress will ask you for some important information like WordPress admin email, password, site name, meta description, and other information. Some of these are optional, so if you want, you can skip that.
Also, plenty of good themes are available in the dashboard, but if you want to install them later, you can easily skip this with the “skip button.”
If you click the skip the setup option, it will take you to a page where you will find a button named Install WordPress.
After that, you need to click the install button, and that’s it. The process of installing WordPress on Hostinger hosting is that simple. Now, you have successfully installed WordPress CMS for your blog.
You can now manage your website content like- posts, pages, and all other things from the WordPress dashboard by log in with your WordPress admin email and password.
Note: If you don’t know how to log in to your WordPress dashboard, you just have to write your website, then /wp-admin/. For example, www.yourdomain.com/wp-admin/.
Step 5: WordPress Theme
Themes are the most important part of a website. Choosing a proper theme that is eye-pleasing to your viewers and goes with your niche is important.
You have two options when it comes to choosing a theme. One is paid, and one is free.
I always prefer paid themes because they are not expensive and can give your site a unique and eye-pleasing look. I am using Elementor Pro on this website.
Here are some of the most famous and useful themes you can use: Kadence or Elementor Pro.
These are the famous and most useful themes. The good thing is that all of them offer a free version.
But I suggest you go for the premium version because it will ultimately become a crucial decision for your blog site.
Now comes the part about how to install themes on your WordPress site.
First of all, you need to log in to your website’s WordPress dashboard. After log in, you will find an appearance button in the left column. Then, you will find an option called “Themes”.
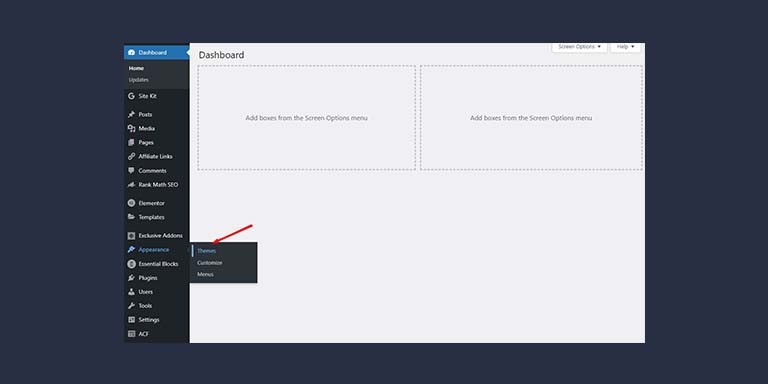
Click on the themes, and it will take you to a window where you will see a new button at the left corner of your window. Click the button, and you will see many free themes to install.
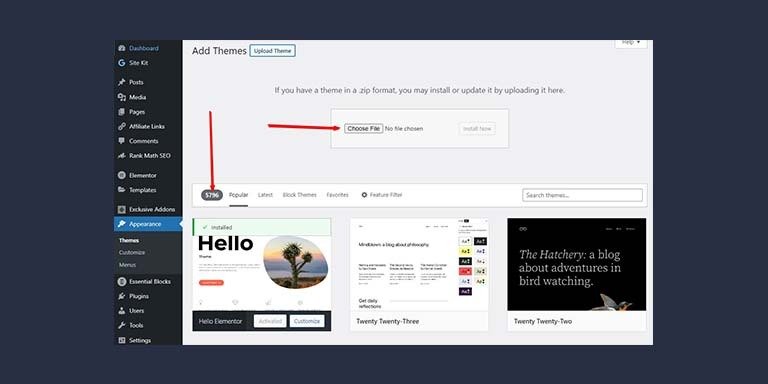
If you want to install an external theme from a site like Envato, go to “Appearance”> “Themes”> “Add New,” upload the zip file, and click “Install.
Step 6: WordPress Plugins
You will need some tools to run a WordPress site properly and easily. These tools are essential to make your work easy.
Usually, these tools are called plugins. There are plenty of plugins available for WordPress.
But not all of them are good. Here are some of the best WordPress plugins that will help you manage your website:
Wp rocket: Wp rocket plugin will help you to speed up your website. As a result, your website will load faster and smoother.
Elementor Pro: Elementor Pro will help you to decorate your website. Not only this but with the help of this plugin, you can easily decorate any of the parts of your WordPress website.
Rank Math: Rank Math is one of the essential plugins, and you must need this. This is a plugin that will help you with your on-page SEO. We know that on-page SEO is crucial work to ranking your website. This plugin will make your work easy.
Also, there are many more plugins that you can use for better customization of your website. But as a beginner, these plugins are enough for blogging.
Now, let’s come to the part about how you can install plugins to your WordPress website.
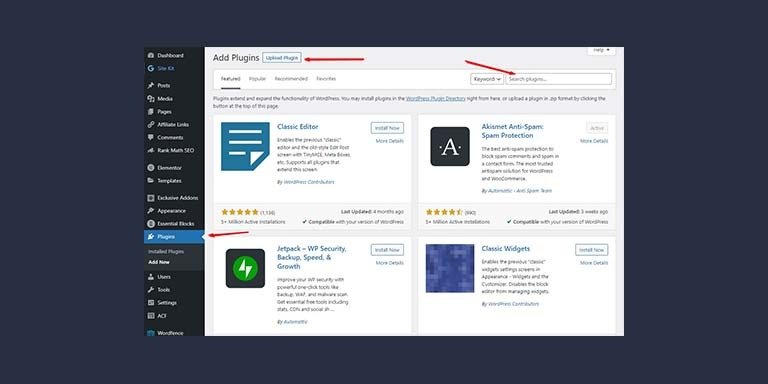
You will find an add plugin option in the left column of your dashboard. From there, you can easily add any plugins you want.
Step 7: Write Ten Blog Entries
Write ten blog posts before you make your website look nice. This will show you what your life will be like as a blogger.
This is what you’ll do most on your blog for at least the first year. Just use the list you made in the last step of popular topics in your niche and try to write about them. In this step, you need to find your writing potential.
What if you don’t have the passion for writing or you don’t have the skill to write?
It’s a common problem for us that we don’t want to write for a long period of time.
Because the work is very tedious and can be boring sometimes, and especially writing needs patience and skill. As a beginner blogger, people lack experience and skill.
The solution to this is to use a writer. In this era of AI, you can easily purchase a writer.
Hiring a writer is pretty expensive, but you can purchase an AI writer with a fraction of that money. Now you are thinking about which AI writer would be best for me, right?
Here are a few AI writers that are pretty good at content writing: Writesonic, Rytr, and Scalenut.
Step 8: Understand SEO
People spend years learning and practicing search engine optimization, so you don’t have to know everything about it.
But it would be best if you learned the basics to use the right keywords in your first ten posts to help them rank faster on Google.
Learning SEO is a pretty hard task. It takes at least six months to learn the basics of SEO. Without proper SEO, you can’t rank at the top on Google’s first page.
So, you need to hire an SEO expert. But hiring an SEO expert is pretty costly, and as a beginner, most bloggers can’t afford an SEO expert.
You can use plenty of SEO software to help you in this case. Some of the best software you can use to improve your SEO are SEMrush, Ahrefs, and Ubersuggest.
Step 9. Driving Traffic to Your Blog
It would be best if you went to places where your audience hangs out, like social media platforms, to promote your content and get people to visit your blog.
Google SEO takes time, even when it’s done right, and you won’t see your blog rank for anything before the end of your first year of blogging.
Depending on your niche, Pinterest, Facebook, Instagram, Twitter, or even TikTok could be the best social media platform.
Once you’ve published your first ten blog posts, you should check your Google Analytics to see which ones get more traffic and social media engagement.
You should check to see which platform brings you the most traffic. When you figure out what’s working, put more effort into it.
People often want to skip the following steps, but if you only have ten blog posts, you will only be able to make a little money from your blog. Use what worked well and put it to use in the next 20 blog posts.
Also, you will need to grow your audience before any ad network accepts you. Also, you should be ready to make money from your blog by ensuring it has enough content for people to read one post, then move on to another related post and stay on your website longer.
Once you have a few visitors and different articles on your site, you can compare which topics are more popular and keep people on your site longer.
Step 10. Make Your Website a Leader
This is the last step because you can only start building your online authority once you’ve written enough content on your blog and grown your audience to a specific size that makes you an authority.
If you try to do this early enough in your blogging career, you’ll be doing things backwards.
Because if your blog is brand new and has little content on it, you might be too scared to talk to other site owners.
Also, you’d get too many NOs, which can be very discouraging for someone who is just starting a blog.
Backlinks are essential for your site’s authority, and you can get them if you have good content. But you shouldn’t just sit back and wait for backlinks to come to you on their own.
Some of these links can be built passively and naturally, but if you want to become a massive authority in your niche, you need to take action.
All these ways to build links will take your time from reaching out to brands and building relationships with other website owners who might want to link back to you to make online collaborations, like doing interviews, going to podcasts, and getting featured on YouTube channels in your niche.
Learn How to Make Money from Your Blog
Now, you can start putting together ways for your blog to make money. You will still post regularly, but you should also begin organizing your content in a way that lets you use more than one way to make money.
From the start, you should learn how to run your blog like a business.
Making your first $100 or $1,000 from your blog will significantly boost your motivation to keep going with it.
So, let’s talk about how you can make your first money as a blogger. You can apply to ad networks like Google Adsense, Ezoic, and Mediavine that need less traffic to start.
These are good for beginners, but as your traffic grows, you’ll want to look at better options like SheMedia, Monumetric, Mediavine, and Adthrive.
Affiliate marketing lets you add links to the products and services of other companies and get paid for each sale.
A simple digital product (like an eBook or PDF guide) for your readers that covers your area of expertise or is related to the main topic of your blog is another way to start making money with your blog right away.
You can promote this product on any website page, and your audience will pay you directly. You don’t have to reach a certain amount of traffic.
People will gladly pay you $12 or $20 to get your information in the form of an eBook if your content is excellent and trustworthy.
To make your first $100 from the blog, you’ll only need to convince a few customers to buy your eBook.
Also, if you want to make a very profitable blog, diversify even more and build multiple ways to make money from your blog.
Let brands pay you to write about them or sell your services on your blog. You should think of more than just adding display ads like Google Adsense to your blog to make money.
Last Thoughts
If you want to get rich quickly, there is a different way. Instead, find a different business to start since blogging takes time.
Also, when it comes to Google, I always say, “If you’re from the Show Me State, you’ve got to show and prove that you’re here to stay with valid information and that your site deserves the traffic.”
If you think this will be a swift process, consider looking into something else. Blogging is a great thing to do, but it takes time to get good at it.
So, you have to know that it will take some time. Now that we’ve talked about time, I want you to be kind to yourself.
Since this process will not be perfect, there is no ideal way to do this. I hope this article will help you start your blog.

One Response
Thanks, I’ve been looking for this for a long time.